You can use Trade Helper to generate links for custom builds.





Hey there Exiles!
Today I wanted to showcase my dedicated "ToTA only build" with you. It was a lot of fun to put together, and I think I will be going to lvl 100 with it over the league, because it is so much fun to play matches with it.
I am able to win all matches effortlessly, regardless of rank, enemy unit combination or tribe and I don't have to go aggressively for good unites either, so I am able to pick the rewards I want.
ToTA is profitable I find, not highly, but it is fresh and fun to do, so I decided to make a dedicated build just for it. You don't have to be a skilled player - with this build, everyone can win consistently.
With new tattoos coming out soon, I thought I wanted to share my build with the community.
Video Showcase and PoB:
-
Min-Maxed PoB lvl 100 - includes crafting guide for rares in notes
Build concept and mechanics overview:
Since playing ToTA matches is a lot of fun and somewhat rewarding at the same time, I wanted to make a dedicated character for it that can handle any opponent regardless of rank and team composition and just have a good time - the build features:
-
200%+ movement speed to get around quickly on the battlefield
-
permanent Phase Run for stealth to get ignored by most enemies due to lower detection radius. Also grants phasing so you can ignore obstacles like walls
-
85k Evasion + Grace Watchers Eye mod to cap at 95% chance to evade even against opponents with the "accurate" modifier
-
75% dodge chance
-
90% attack block + 75% spell block to avoid all damage when getting hit through those layers
-
guaranteed 30% action speed reduction through chill on every hit with 200% increased chill effect scaling paired with always chill for at least 10% cold mastery
-
double curse auto trigger setup on attack through Asenath's Mark to apply full effect high level Temporal Chains + Enfeeble
-
Call of the Void for enemies to deal 15% less damage
-
Champions Conqueror ascendancy notable for taunted enemies to deal 20% less damage to other targets on top of the 10% less from being taunted)
-
Ensnaring Arrow to reduce enemies movement speed and to also have a chance to apply flee and knockback
-
Tornado Shot Ballista Totems to distract and apply blind, maim and extinguish constantly to all enemies on the screen and off-screen
-
Void Sphere to apply additional CC, holding enemies in place and to "reposition" bugged Titanic Shells (this bug will likely get fixes next patch)
Further thoughts and explanations behind mechanics used:
The goal was to create a build with maximum chance to avoid and reduce damage at all cost. So going Champion was the natural choice.
-
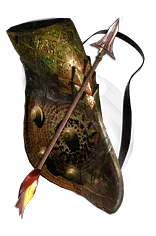
getting 90% block and 75% spell block on a bow character is possible this league by clever use of tattoos, Blue Nightmare jewel, The Anvil + anoint and the Widowhail + Reargard quiver combo as well as stealing Reigning Veteran notable from Gladiator via Forbidden jewels. Getting 90% block makes a huge difference compared to 75%.
-
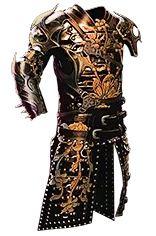
Evasion and Dodge are scaled with Perfect Form unique body armour, some cold resist scaling, evasion scaling from tree and ascendancy and Grace + Watchers eye to cap evasion and dodge - the use of Perfect form allows for a sweet Timeless jewel spot by Ranger, since we get the Acrobatics keystone from the chest.
-
a permanent uptime quicksilver flask via Balbala timeless keystone paired with some flask duration tattoos since we don't need other flasks
-
Perseverance belt for permanent Onslaught on Champion hanks to fortify being permanent
-
Asenath's Mark is just QoL so that you don't have to cast Void Sphere and Curses manually, also, triggered this way they don't get a curse effect reduction as from other gems like hextouch
-
Ensnaring Arrow + Maim combo reduces enemy movement speed to the cap of -50%
-
30% chill effect on any hit is reached via 10% minimum chill cold mastery + 200% increased chill effect scaling via cluster jewels (they serve no other purpose other than giving some stats/resists). Also utilizes "Chilling Presence" to chill enemies near you even if they don't get hit by an attack recently (for the case the revive near you while you are channeling a totem at the same time)
-
the build only gets chill and freeze immunity, since other ailments don't matter (thanks to extinguish), as well as a good amount of regen and mitigation to survive minor dots and small hits from regular enemies - you can't survive big hits anyway at higher ranks, so we don't build around that.
-
getting %action speed on boots allows you to move even through immobilizing effects slowly (showcased in the video)
Why to use damage reduction layering at all? Don't you get oneshot anyway?
Yes, you will get oneshot anyway on most builds at high ranks from most attacks and DoTs (but not all), but your teammates don't, since they scale as well as enemies do! Protecting and enabling your teammates is a key strategy for this build to win; we use the following layers:
-
Temporal Chains + Enfeeble
-
maim + snare
-
30% Chill
-
20% reduced damage taken from taunted enemies to other targets + 10% reduced damage taken from other targets (via totems) - enemies in ToTA are "unaffected by taunt" by default, but that only counts for the CC effect, not the damage reduction aspect of being taunted, since taunt still applies to them - there AI just does not get affected, that's it.
-
Call of the Void for enemies to deal 15% less damage
-
Extinguish to prevent Ignites, Freezes, Chills and Shocks from hits
Enemies that have their damage dealt reduced by roughly ~60%, their action speed lowered by 60%, their movement speed lowered by 50% that can't inflict any ailments at all to your teammates are easy to beat, even if you have a significantly weaker team and lower unit quality compared to your opponent.
You yourself have enough defense layering to survive small hits and DoTs (you can run out of ground effects quickly and survive) which is very helpful and speeds things up significantly.
What is the deal with Void Sphere in this build?:
We don't abuse Void Sphere like other builds do, we just use it to disrupt the enemy for a brief time and stack them together to clump them up when they decide to attack in a group formation, to give our flankers room to get into their back line.
We also use it to deal with the Titanic Shell bug for the time being (bug will get fixed next patch, probably). Titanic Shells while channeling protect all totems in a radius, which prevents your teammates from attacking them - they will hang around in your base and do nothing. Titanic Shell is immune to knock back, but not immune to Void Sphere! So with smart placing of consecutive Void Spheres in a straight line, you can drag the Titanic Shell to your base while it is still channeling where your defenders and Attackers will start to attack and kill her eventually for you - after she is dead, run to its totem and destroy it manually quickly.
I only do the effort when the reward is good, otherwise I just log out and take the loss since it is quicker to deal with. But this gives you a method to win regardless if needed.
Why not go CI? Isn't Tawhanuku (Hinekora Tribe) scary to you?
Tawhanuku is the only enemy on the field that does significant amounts of chaos damage after all the layering applied, I found - she will oneshot you regardless if you are not immune to chaos damage at some point with her abilities.
Her abilities are telegraphed with an audio que attached to it:
-
When she starts channeling and the que goes "Choir of Souls" - just run away from her off-screen to dodge her Soul Rend Nova, which will kill you if you get hit by a projectile
-
When she raises her hand and the que goes "Death from up high" 3 chaos meteors will strike you where you are standing - you can spell block them, just stop what you are doing and step aside
Otherwise, she is harmless - you can stand right next to her and do you stuff, she won't be able to touch you with her auto attacks.
When it comes to Death's Guide chaos aura totems... just tech your team for it to deal with those, that's it. If you don't have good unites to deal with it, just drag the Death's Guide in your base with Void Sphere and let your defenders kill him for you so that the aura gets disabled around his totem.
What about Kahuturoa and Kiloava (Proximity Shields), aren't they hard to beat?
Kahuturoa is where most builds struggle, since his teammates and his abilities all oneshot due to %phys damage reduction penetration. This build can deal with him easly and has a good time against him, since all his attackers are usually melee and all his heavy slams are slow - he can't do anything against you if you apply all your layers and win quickly.
Proximity Shields are also no big issue, just run into their bubbles, place your totems and attack to apply your debuffs, run out, and deal with totems - they usually are not able to hit you at all. When you hear the audio que "Valako's Ire", which is a multihit thunderstorm area of effect ability, just run away quickly and don't get caught in the area where the ground gets lit up, it will oneshot you.
That's probably it - if you have any questions, feel free to ask, thanks for reading!
Life
3534
Mana
0
Energy Shield
117
DPS
66
Effective Hit Pool
InfinityT
Phys Max Hit Taken
9.51K
Chaos Res
75
Fire Res
76
Cold Res
76
Lightning Res
75
Armour
10K
Evasion
85K
Block
90 | 75
Crit Chance
0%
Crit Multi
0%
Rage
0
Strength
159
Intelligence
163
Dexterity
213
Ward
0
Item Quantity
0%
Item Rarity
0%
Movement Speed
223%


