

You can use Trade Helper to generate links for custom builds.


PoB: https://pobb.in/llR4TeKJxAZR
tl;dr: 87% block, crit immune, 100% suppression, Mageblood-at-home-Pathfinder, hundreds of millions of Uber dps, lots of layered defenses (Frost Shield + Molten Shell + Master Surgeon)
Introduction
Here's a rough outline for my character that turned out better than expected. It deletes 8 mod Feared bosses pretty quickly, and this was the first league I could farm Ubers + Feared with consistency. I've wanted to run a strength stacking Annihilating Light Molten Strike for a while, and this league's Charm system and MS of the Zenith transfigure really motivated me to push my snowflake build to 100.
The core of the build is the strength stacking boots, Replica Alberon's Warpath. Instead of opting for Original Sin + fire damage strength stacking, we lean completely into the triple damage afforded by Annihilating Light, which, being a staff, also allows us to use Molten Strike of the Zenith for absolutely massive damage spikes, which can 100 to 0 Ubers on lucky (even average, once you get enough strength) damage rolls. We are stretched too far to allow crit, so we opt for Precise Technique instead.
The Joy of Pathfinder
Pathfinder allows permanent uptime on important unique utility flasks without Mageblood. We do this with tree nodes and a rare belt with reduced flask charges used and flask effect duration. Our flask setup is:
-
Alchemist's Bismuth Flask of the Rainbow (gives ~160% all elemental resistances!)
-
Perpetual/Chemist's Amethyst Flask of the Dove (later becomes Progenesis)
-
Replica Sorrow of the Divine, high enough roll for permanent uptime
-
Dying Sun (replace with Chemist's Silver Flask of the Owl when curse immunity is needed)
-
Sapping Divine Life Flask (preferably 30% quality, use any bleed/CB immune suffix).
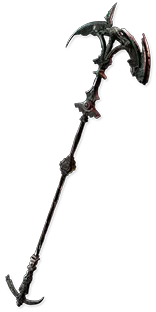
Attacking with Annihilating Light
Replica Alberon's Warpath provides a ton of base damage for any strength stacking build. Tripling it makes the raw hit damage the least of our worries. There are, of course some issues:
Problem 1: The first glaring problem that the build ran into was dealing with a 1.30 APS weapon. We need a lot of attack speed for the build to feel playable and mobile enough to dodge with leap slam.
Solution: Martial Mastery on 2x Large Cluster Jewels and 2x Megalomaniacs, Haste on a blessing. You can fit in Blood Rage, too, and I'm sure there's a way to get Frenzy charges in the build (but they mess with Eater of Worlds altars, and I just never put them back).
Problem 2: The obvious problem of 60% reduced elemental resistances.
Solution: Permanent uptime Alchemist's Bismuth Flask of the Rainbow.
Problem 3: Resource sustain.
Solution: Permanent uptime Replica Sorrow of the Divine for Eldritch Battery and Master Surgeon, allowing us to reserve 100% of mana.
Defenses
-
100% spell suppression. We're around that part of the tree anyway, and a good Lethal Pride adds a ton of value to the nodes around Inveterate.
-
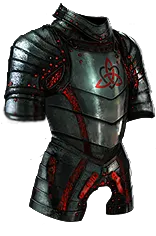
87% block. Achieved with charms, That Which Was Taken, Iron Fortress, The Red Nightmare, and Steelwood Stance from an Impossible Escape around Glancing Blows. You don't actually need 87% when bossing, since most of the dangerous stuff isn't blockable, but it was extremely useful for mapping, tanking Soul Eater Abyss rares, and the grind to 100.
-
Crit immunity. Achieved with a Determination Watcher's Eye, an Armour Mastery, and Sanctum of Thought from the Impossible Escape. IMO 100% reduced extra damage from crits is super important, especially if you're hunting blue wisps, and it turns the map mod into free real estate.
-
Frost Shield, Enduring Cry, and Molten Shell. Replica Sorrow of the Divine and our Life Flask allow us to trivially max Frost Shield stages, and these layers together eat a lot of damage.
-
Master Surgeon and a Sapping Divine Life Flask. With enough Life Recovery from Flasks (on a belt, on a Vitality Watcher's eye, from the tree), you recover your entire life pool in about two seconds and can have it up almost permanently.
-
Fortify. From Overlord on a Megalomaniac, but you can also use an Overlord + Martial Prowess Large Cluster Jewel too.
-
Progenesis. It's expensive but it's the most OP defensive layer you can get in a build that's already flask-oriented. Roll it until you get 100% uptime, it really is that good
Budget Considerations
The core uniques of the build are: Replica Alberon's Warpath, The Annihilating Light, Crown of Eyes, and The Iron Fortress. You'll also want a belt with 18-20% reduced flask charges used, strength, and 20%+ flask effect duration. The jewels you need to get started are: Impossible Escape, Str/Acc Split Personalities, Martial Mastery cluster jewels, and a Lethal Pride.
Before you get a Nimis and Helical Ring, two decently rolled Le Heups of All are perfect for the build. Replace a link with Returning Projectiles.
If you need resistances, opt for a rare amulet or talisman instead of Eyes of the Greatwolf.
If you can't find a Crown of Eyes with the 90% cost and reservation implicit, use an Enlighten.
You don't need a Synthesized Belt if you can't afford one. A Heavy Belt or Stygian Vise with a defensive utility Abyss Jewel will suffice.
If you don't have enough Energy Shield for Divine Blessing, you can use the Life Mastery to offset 30% of the cost to life.
Use 6-7% Strength charms until you can afford 8% Strength charms.
Possible Improvements/Adjustments
Enlighten 4 could allow you to anoint Whispers of Doom instead of Sovereignty and add in Sniper's Mark for more damage.
You could probably sacrifice some block chance for i.e. frenzy charges and get even more damage and speed.
You'd do more damage overall without GMP, but I like it for more consistent Wither stacks and smoother mapping.
????: if you can find a way to improve the build that I overlooked, suggestions are welcome and appreciated! Let me know if you decide to try it!
Life
4948
Mana
20
Energy Shield
540
DPS
26M
Effective Hit Pool
123.17K
Phys Max Hit Taken
26.44K
Chaos Res
66
Fire Res
75
Cold Res
75
Lightning Res
75
Armour
13K
Evasion
49
Block
87 | 0
Crit Chance
0%
Crit Multi
0%
Rage
0
Strength
2197
Intelligence
188
Dexterity
349
Ward
0
Item Quantity
0%
Item Rarity
0%
Movement Speed
45%


