

You can use Trade Helper to generate links for custom builds.


Firstly, the PoB - https://pastebin.com/7xGXsCv6
About the PoB - When initially brought up, the PoB will show a basic level 90 tree and have some fairly budgeted gear to emulate an early-mid range red map setup. The only truly expensive piece will be a Ryslatha's Coil, everything else is generic rare gear with a few needed stats as well as a mid range Crown of the Inward Eye, which might cost a bit in the first few days but will quickly fall in price as the league goes into next week. Also, the damage shown does not include both Warchief and Protector totems nor does it have maximum value on Pride ticked, as those are more inconsistent buffs and I prefer to show the baseline consistent damage that the build will almost always have (generally speaking ticking these should add about 60-80% more damage, which is more relevant for single target boss fights).
A slightly altered level 93 tree (that includes a Pride Watcher's Eye) is available (the "default" tree), as is two higher budget item setup's in the drop down that show the general intention of some specific rare gear that we will be looking to get once some good currency has been farmed. Also, for all you degenerates out there I have included a full PoB Warrior gem setup that includes everyones favorite Awakened support gems at full level (don't take that seriously).
Everything below is based off the early gear and tree setups, with numbers in parenthesis showing the higher end potential of the build after some more serious investment has been put into it (generally around 30 ex or so).
Offense
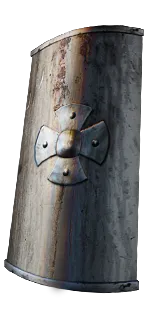
Generic flat scaling from relatively easy to acquire high armor shields.
Impale
Light Accuracy stacking for 40% more attack damage from Precise Technique keystone.
Ryslatha's Coil and Violent Retaliation interaction for roughly 25-30% more damage from lucky attack damage (also free physical reduction ignore).
Lots of speed from Challenger Charges, improving our mapping experience by quite a bit.
Total: Just over 1 million in damage from two overlapping waves, 1.8 million when using totems and maximum Pride effectiveness. (1.8 million and 3.7 million with higher budget gear and tree, respectively).
Note: People who have played Shield Crush before already know that it can take some good positioning to consistently hit an enemy with two overlapping waves. Experience and skill will play a factor in this, but to be safe we could say that we do so 50% of the time so this would equal a rough damage output of 750k and 1.2m with totems and pride ticked. (1.2m and 2.8m for late game).
Defense
50% attack block/50% spell block with Versatile Combatant (actually we have 48% spell block, but finding 1% more block should be easy).
80-100% spell suppression chance depending on rare gear mods (is a priority).
5200-5700 life (depending on gear).
14-20k armour (without Determination).
300-500 life regen (again, depending on gear but is not a high priority).
1k+ life leech (I always invest a few passive points into getting a full leech node to make sure it's always as consistent as possible. Lust for Carnage also gives some good attack speed).
Note: If you haven't noticed, I have not invested anything into Fortify here, and have instead put that investment into maxing out spell suppression. This is a conscious choice I have made for the build. I want the build to be relatively safe against endgame bosses, and endgame bosses tend to have deal more damage with spells than they do attacks. Spell Block + Spell suppression will be much more valuable for this than fortify would. For attacks, a decent armor value will protect us a little against those attacks that get through our 50% block (there are few dangerous attacks in this game that are fully elemental and have no physical damage component).
If you prefer fortify over spell suppression, the change can be made without too much trouble (just ditch the spell suppression nodes for the fortify nodes instead). And if you want to go even further into defensive layers, damage can be sacrificed through either passive points or swapping out the Melee Physical Damage support gem for Fortify, keeping the spell suppression as well.
Problems to Solve
Rare mod dependence - Though we are wearing mostly rare gear, there are a number of suffix mods that compete with each other, make getting everything through rare gear moderately difficult (though trade league should make this rather easy). Between Resistances, Accuracy, and Spell suppression, we will be juggling those suffixes to get as much as possible of each one. I recommend going with a rare helmet instead of a Crown of the Inward Eye until we can sort this issue out.
Adding to the complications, it would be nice to fit some Life Regeneration mods into our armor pieces, since one the biggest threats to this build will be damage over time. But we'll start stretching our mod pool pretty thin here, so we don't put a huge priority on it.
Low Mana Pool - Thanks to the large number of relatively important aura's we use, our mana pool is going to be rather tight. Fortunately, we use multistrike in this build so generally speaking we can make do with a mana pool at least twice as much as our attack cost. Solutions include - mana cost on jewelry and a few mana prefixes on gear, or two passive points for the Mana Flows node on the tree. Worst case scenario, we can drop Vitality until we get things figured out.
DoT Weakness - As a block and general avoidance build, ground DoT's are going to be an everpresent issue for us. Generally speaking, I prefer to get as much life regeneration as I can on any build that I do, but seeing as how we are rather tight on our available suffix mods I don't expect to be able to get too much of it. The Soul of Arakaali and Soul of Shakari pantheon's are probably our best fix for this right now, but it's not a perfect answer.
Life Recovery - I generally prefer builds with much higher recovery than this one, but with the amount of avoidance and mitigation we have I think this is somewhat satisfactory. Being stretched for life regen, we will mostly rely on leech. When relying on leech, I always try to put a bit of investment into it, since leech can sometimes not be at it's best when running around avoiding boss mechanics. So I've fully specced into Lust for Carnage for the 100% increased recovery (giving us full leech recovery almost always) and a bit more Max recovery.
Why Gladiator over Champion?
Cause I fuckin like Gladiator, ok?
Actually though, I do think there are some benefits that Gladiator provides over Champion in a shield attack build. Champion's strongest node, Master of Metal, doesn't actually provide as much as it normally does since we get so much flat damage from our shield in the first place. Adrenaline is only slightly better than Challenger Charges in terms of offense while being more inconsistent for uptime. Intimidation can be gotten easily on gloves, and it will actually be quite a bit harder to get that extra 14% block to fill out our spell block.
Overall, Champion trades a bit less damage, speed, and spell block for Fortify and Adrenaline recovery. I'm also not sure if we would even go for Spell Suppression with Champion. Either way, the build should look relatively the same and Champion would be a great choice as well.
What can I expect from this build?
Shield Crush is a skill that can be taken from level 1 to the very endgame, and its process through the campaign is pretty smooth considering it is melee. Gearing should not be particularly difficult while progressing through the Atlas, and red maps can be pushed through on a relatively low budget (Ryslatha's Coil will be our one big purchase). Mapping should be a breeze with the speed granted by Challenger Charges (throw on a pair of Haemophilia's for those bleed pops). Basic endgame bosses shouldn't be much of a problem, though I wouldn't expect to take on any of the buffed content until more investment can be put into the build.
I am entirely unsure of the build's performance against the new "Uber" versions of the endgame bossfights, but I will say that considering that this is a melee hit build it will probably not be suited towards this content without some major endgame revisions and currency sinking.
​
I am going to be doing some practice levelling soon, so if there are any specific questions concerning levelling I will be happy to answer them. And of course, if you have any other suggestions or possible alterations to the build I would be happy to give them a look.
Thanks for reading, and enjoy the new league!
Life
5467
Mana
67.47
Energy Shield
212
DPS
1M
Effective Hit Pool
61.63K
Phys Max Hit Taken
Chaos Res
-60
Fire Res
75
Cold Res
75
Lightning Res
75
Armour
14K
Evasion
0
Block
50 | 48
Crit Chance
0%
Crit Multi
0%
Rage
0
Strength
249
Intelligence
50
Dexterity
219
Ward
0
Item Quantity
0%
Item Rarity
0%
Movement Speed
61%


