

DISCLAIMER: this build feels very clunky to play for some people and is NOT a particularly fast mapper, although you can clear most of a map quickly if you're being efficient. Also keep in mind that the damage in the PoB is somewhat inflated for reasons I explain in the notes section but is accurate in an ideal situation, and you can expect around 60-100m consistent dps versus most bosses with my current setup.
This build makes use of the interaction between the Black Zenith gloves and Flamewood Support to deliver a high dps bosser with incredibly strong defenses on a very affordable budget.
Current PoB (60-80d): https://pobb.in/4n9RoK31-smQ
How Does It Work?
Black Zenith and Flamewood Support have a unique interaction that allows for all of the benefits of Black Zenith to be gained with virtually no downsides. Normally, the +4 seconds to socketed projectile spell cooldown prevents these gloves from being usable with any other skill, as the increase in damage that they offer is not enough to justify the massively increased cooldown. However, although each totem summoned with Flamewood is affected by this cooldown increase internally, placing a new totem resets the cooldown for Flamewood on that new totem. This means that our damage is only limited by how quickly we can place totems and how quickly enemies can hit them. Additionally, the line on the gloves that reads that socketed projectile spells are fired in a circle does not affect the Flamewood projectiles' behavior whatsoever. All of this means that we have a spell with incredibly easy-to-scale damage that fits on a four link, giving us a huge amount of room to buff our defenses. It also means that we play as somewhere between a summoner and a caster, meaning we can deal all our damage from range while easily being able to dodge boss mechanics (or just tank them, it really doesn't matter).
Offensive Layers
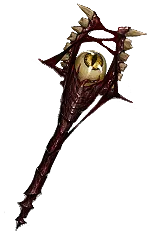
Unlike other skills, the base damage of Flamewood scales with the maximum life of the totem it is supporting (in this case, Rejuvenation Totem). We use Replica Dragonfang's Flight to get +3 skill levels for our Rejuvenation Totem, another +2 levels from a corrupted socketed aoe gem implicit on our Black Zenith, and our final +2 levels from the reworked Dark Seer sceptre. This brings us up to a level 28 Vaal Rejuvenation Totem. We further scale our base damage with the Torchoak Step boots and 17 tattoos of the Ngamahu Woodcarver, each one giving us 5% totem life. We also take several notable passive skills like Ironwood and Primal Manifestation to increase our totem life even more. This gives us a staggering amount of base damage to work with, which we primarily increase through our other gem link setups. Because of us needing to take Runebinder, we need to come up with a solution to apply our debuffs through other ways than dealing damage with our own skills. Our first way to combat this is a four link with Wave of Conviction, Combustion, Culling Strike, and High-Impact Mine. This gives us a way to reliably inflict a -25% fire exposure (15% from wave and 10% from combustion) and allows us to cull enemies. Secondly, we are using a six link Arcanist Brand to apply Enfeeble, Elemental Weakness, Flammability, Punishment, and Sniper's Mark with one button press. We can apply all five of these curses thanks to the Anathema ring and two +1 maximum power charge notable passive skills on our tree, and they are a massive portion of our single target damage and survivability. Because we also scale curse effect and level in several places in our gear and tree, we become a pseudo cursebot (fantastic for playing with friends). We are not a crit based build, so Elemental Overload is a huge damage multiplier for us. We can reliably apply Covered in Ash from our Polaric Devastation and Malediction from the Dark Seer for even more damage. Multiple Totems Support gives us double the totem summons per second and improves our maximum totem count, and Concentrated Effect Support reduces the spread of Flamewood and gives it a significant more multiplier to damage. Lastly, the Rain of Splinters unique jewel brings us up to a total of 7 projectiles launched per Rejuvenating Totem that we summon.
Defensive Layers
Because we don't need to allocate too much of our power budget to dealing damage, we have access to incredible defensive layering that makes us unbelievably tanky. The most important of these layers is the Fourth Vow body armour combined with Divine Flesh and the Unbreakable juggernaut ascendancy node, making us virtually immortal against smaller hits due to how much armour we are stacking. Molten Shell is a no-brainer for armour based builds, and gives us a huge amount of burst mitigation. Enfeeble and Punishment give us significant percentage based damage reduction. We are able to cap our block and spell block chance through Glancing Blows, Rumi's Concoction, our shield, and several passive tree skills. We get a decent amount of evasion and a ton of armour from our jade flask and basalt flask respectively, and since our build can facetank virtually every enemy ability in the game, our flask charge generation is surprisingly good from charges gained when hit. The Dark Seer sceptre gives us a massive amount of flat life on top of permanent blind application. We get maximum elemental resistance from Soul of Steel and Prismatic Skin alongside a +2% to all maximum resistances suffix on our shield. We also have permanent maximum endurance charges from the Unflinching juggernaut ascendancy node, which improves our maximum physical hit significantly. When it comes to life recovery, we gain a large amount of flat regen from our Rejuvenation Totems themselves alongside Untiring. We also recoup 25% of the damage that our totems take as life thanks to Arohongui (allocated through flesh and flame), which is absolutely disgusting on an ascendancy that usually struggles with quickly regenerating life. On top of this, we have 5% life recovery on block from our shield with capped block and spell block and a life flask. Using the Vaal skill on Vaal Rejuvenation Totem effectively makes us immune to damage for its duration and gives us an additional Flamewood trigger. With this many sources of life recovery/regen and max hits upwards of 140k with molten shell on, the only thing you can expect to die to are extremely strong degens or damage over time effects like uber shaper beam.
Auras
Our aura setup is pretty basic as we barely have any room for reservation efficiency. Determination gives us a ton of armour, Tempest Shield gives us a lot of spell block chance and shock immunity, and Herald of Ash is free damage. We have Zealotry linked to Divine Blessing and Inspiration for even more damage.
Mana Solution
Our build fixes mana issues in a very streamlined and efficient way. Normally, resummoning totems is unbelievably mana intensive and almost impossible to do without significant investment in mana regeneration or use of lifetap. However, taking Eldritch Battery alongside some other nodes that I'll get into elegantly solves this issue. First off, we should note that using the Fourth Vow and Divine Flesh makes it so that energy shield is completely bypassed when we take damage. This makes Eldritch Battery make use of an otherwise dead resource. On top of this, we can use the armour and energy shield mastery that gives us energy shield recharge based on our armour (we stack a LOT of armour) to give us insane energy shield regen. Combine this with the life mastery that makes a portion of our skills cost life instead of mana to cast, and we now have almost perfect mana sustain for spam resummoning our totems while maintaining perfect uptime on our divine blessing.
Final Notes and Showcase
This build is all content viable, and can be built starting from an extremely low budget. It is unique dependent so I wouldn't really recommend it for ssf, but the Black Zenith gloves are relatively easy to target farm if you really do want to go down that route.
Thanks to Snyo and Jungroan for the inspiration for the build, check out their videos from tota league here:
Jungroan Flamewood Chieftain: https://www.youtube.com/watch?v=MtrkEdpIyhY
Snyo Flamewood Scion: https://www.youtube.com/watch?v=aaWpMUQmJEY
Early game PoB (5-10d before Fourth Vow Swap): https://pobb.in/VcW27v5zLFOS
Mid game PoB (30-50d): https://pobb.in/GJ2iEr-R4VTE
Current PoB (60-80d): https://pobb.in/4n9RoK31-smQ
T17 Fortress Map: https://www.youtube.com/watch?v=1nFRfo7vFzY
Facetank Uber Eater Slam: https://www.youtube.com/watch?v=lhBySWrHFaA
Uber Cortex: https://www.youtube.com/watch?v=RCwDh-xYZGY
T17 Sanctuary Boss: https://www.youtube.com/watch?v=_arjDP9iadM
Facetank Uber Cortex (Tanky Map Mods): https://www.youtube.com/watch?v=hPDQSIOlBEU
Some of the showcases are laggy because my recording software has been acting up recently, sorry for that but otherwise let me know if you have any questions and I'll do my best to answer them.
Life
3745
Mana
50
Energy Shield
626
DPS
150M
Effective Hit Pool
144.38M
Chaos Res
82
Fire Res
80
Cold Res
80
Lightning Res
81
Armour
114K
Evasion
3K
Block
75 | 75
Crit Chance
9%
Crit Multi
100%
Rage
0
Strength
173
Intelligence
163
Dexterity
83
Ward
0
Item Quantity
0%
Item Rarity
0%
Movement Speed
71%


